Layer, Embed, Reveal: Resin Built for Mixed Media
Mixed media artwork thrives on combining unexpected materials-acrylics with fabric, paper collage with metal elements, photographs with glass fragments. Epoxy resin acts as both an adhesive and protective coating, unifying disparate materials into cohesive finished pieces.
Clear Resin formulas are designed specifically for artists working across multiple mediums. Whether you're encasing vintage papers in layers of transparency or securing metal embellishments to painted surfaces, the right epoxy transforms individual components into permanent artwork.
What makes epoxy resin ideal for mixed media work?
1. Bonds diverse materials, including paper, fabric, metal, glass, and wood
2. Creates dimensional depth through layering and encapsulation
3. Protects delicate elements from moisture, UV damage, and handling
4. Crystal-clear transparency that doesn't distort colors or obscure details
5. Self-leveling properties that create smooth surfaces over textured underlayers
Clear Resin
Clear Epoxy Resin Kit - 64 oz
Share

Why Artists Choose Epoxy Over Traditional Methods
Traditional adhesives like white glue or Mod Podge work for basic applications but lack the structural integrity and archival quality serious artists require. They yellow over time, don't provide substantial protection, and can't create the glass-like depth that epoxy delivers.
Epoxy bonds at a molecular level. Your mixed media components become permanently integrated rather than simply stuck together. This matters especially for artwork you plan to sell or display long-term.
Compatible Materials and Preparation Techniques
Paper and Collage Elements
Incorporating papers, photographs, book pages, or ephemera into resin requires preparation. Porous paper absorbs epoxy unevenly without sealing, creating dark transparent patches that ruin the aesthetic.
Paper preparation steps:
- Select completely dry paper elements
- Apply a thin sealer coat (mod podge or spray fixative)
- Let the sealer dry completely (2-4 hours minimum)
- Position papers on your substrate before resin application
- Apply a thin flood coat to seal papers in place
- Add dimensional coating layers after the initial seal cures
Vintage papers or book pages with aged patina need extra attention. Test sealer on a sample piece first-some sealers darken aged papers or alter their appearance.
Metal Components and Embellishments
Metal elements add striking contrast to resin artwork. Copper sheets, brass findings, wire sculptures, or metal leaf all work beautifully when properly prepared.
Clean metal surfaces thoroughly before embedding. Oils, oxidation, or fingerprints prevent proper epoxy adhesion. Use isopropyl alcohol on a lint-free cloth, let surfaces dry completely, then position elements before pouring resin.
Popular metal applications in mixed media:
- Copper or brass sheet cutouts as design elements
- Wire sculptures partially embedded in resin layers
- Metal leaf (gold, silver, copper) for gilded accents
- Industrial hardware (gears, springs, washers) for steampunk aesthetics
- Thin metal mesh creates texture beneath clear resin
Heavier metal pieces need support. Don't expect epoxy alone to hold substantial weight perpendicular to the surface; use mechanical fasteners or adhesive in addition to resin encapsulation.
Glass and Transparent Materials
Combining glass with epoxy creates interesting optical effects. Crushed glass, glass beads, sea glass, or stained glass fragments all embed successfully.
Glass must be clean and dry. Any residue or moisture creates visible hazing around glass elements. Wash in warm soapy water, rinse thoroughly, and dry completely before use.
Think about refraction when positioning glass. Light passing through epoxy and glass creates unexpected visual effects-sometimes beautiful, sometimes distracting. Test arrangements before committing to final positions.
Fabric and Textile Integration
Fabric poses challenges because of its absorbency and flexibility. Stiff fabrics like canvas or denim handle resin better than loose weaves or delicate materials.
Seal fabric thoroughly before resin application. Unsealed fabric soaks up shocking amounts of epoxy, depleting your supply while creating saturated, darkened areas. Multiple thin sealer coats work better than one heavy application.
Perhaps consider whether fabric flexibility matters for your piece. Epoxy-saturated fabric becomes rigid-this works perfectly for some artistic visions but might conflict with others expecting drape or movement.
Layering Techniques for Dimensional Effects
Creating Depth Through Sequential Pours
Single-pour applications produce flat results. Layering builds visual complexity that draws viewers into the artwork rather than just across its surface.
Basic layering approach:
- Base layer: Seal substrate and any embedded materials with a thin coat
- First dimensional layer: After 24 hours, add a deeper pour (1/8 inch) over the base
- Intermediate layers: Position additional elements on the tacky surface of the previous layer
- Final coating: Apply topcoat for maximum depth and protection (1/8-1/4 inch)
Each layer needs 24-48-hour cure time before adding subsequent pours. Rushing this process risks mixing partially cured layers or trapping moisture between coats.
Working with Color and Transparency
Clear resin shows everything underneath. Colored resin creates tinted effects while still allowing some visibility of lower layers. Opaque resin blocks underlying elements completely.
Alternate transparent and tinted layers for sophisticated visual depth:
- Clear layer over painted substrate
- Lightly tinted layer with embedded papers
- Clear layer revealing previous elements
- Opaque colored layer as a design accent
- Final clear coating for protection
Color intensity affects how much shows through from below. Start with less pigment than you think you need-you can always add more in subsequent layers.
Embedding Three-Dimensional Objects
Flat elements sit nicely under resin. Three-dimensional objects require different techniques to avoid floating, tilting, or creating voids underneath. Securing dimensional objects within resin calls for different techniques depending on the piece.
An adhesive base works best for heavy objects because it prevents movement during the pour, though it can leave a visible glue line. Gel-stage placement suits medium objects well, allowing for natural positioning as the resin begins to thicken, but the timing is critical and easy to miss. A wire armature is the go-to for suspended elements, creating a floating effect that looks striking once cured, though it requires careful planning upfront.
Stacked pours are the right choice for tall objects, allowing gradual encapsulation across multiple cure cycles. Any object taller than 1/4 inch will need multiple pours, and the key is to build up resin gradually around the sides rather than trying to cover completely in one application. This approach prevents air pockets and ensures complete encapsulation.
Advanced Mixed Media Applications
Creating Resin and Paint Combinations
Acrylic paint works wonderfully with epoxy. Pour resin over dried acrylic paintings to create gallery-quality protection and depth. Or mix small amounts of acrylic paint into resin for tinted pours.
Alcohol inks create organic, flowing patterns when dropped into wet epoxy. The inks disperse in fascinating ways that can't be fully controlled, part of their appeal for abstract mixed media work.
Oil paints need complete curing before resin application. Fresh oil paint contains solvents that interfere with epoxy curing chemistry. Wait at least 6 months, preferably a year, before coating oil paintings with resin.
Jewelry and Wearable Art
Small-scale mixed media pieces make striking jewelry. Combine tiny papers, pressed flowers, metal fragments, or photographs in bezels or molds, then encase in crystal-clear epoxy.
Jewelry-specific considerations:
1. Use thin-viscosity craft epoxy for detailed work
2. Work in very small batches (bubbles are more visible at a small scale)
3. Allow extra cure time for pieces you'll wear (body heat can soften incompletely cured epoxy)
4. Drill findings after full cure rather than embedding during pour
Bezels provide structure for pendant and earring designs. The metal rim contains liquid epoxy while it cures, creating perfectly shaped finished pieces.
Table Top and Furniture Applications
Larger mixed media installations on tables or wall panels require different formulas. Deep pour epoxy allows thicker applications without overheating or cracking.
For table surfaces incorporating papers, photographs, or fabric collages:
1. Create your mixed media design on a stable substrate
2. Seal all porous materials thoroughly
3. Build up protective layers using standard viscosity epoxy
4. Apply final flood coat using table top or deep pour formula
Total thickness can reach 1/8 to 1/4 inch for functional surfaces that will be used regularly. This provides durability against scratches, heat, and moisture.
Resin and Acrylics in Abstract Work
Abstract artists love combining fluid acrylics with resin for dimensional paintings. Pour acrylics in organic patterns, let dry completely, then encase in clear epoxy for glossy protected surfaces.
Alternatively, mix pigments directly into resin and create resin paintings on canvas or panels. This technique produces colors with unique luminosity-light passes through pigmented resin rather than just reflecting off opaque paint.
Experiment with timing to create different effects. Pouring resin over barely-dry acrylics creates some intermixing at boundaries. Waiting for the complete acrylic cure maintains sharp color separation.
Technical Considerations for Mixed Media Work
Calculating Resin Quantities
Mixed media projects with varied surface heights require careful calculation. Measure surface area, then estimate average thickness, accounting for dimensional elements.
Estimation method:
- Calculate flat surface area (length × width)
- Add approximately 15% for raised elements and edges
- Multiply the adjusted area by the desired coating thickness
- Convert to fluid ounces (1 cubic inch ≈ 0.55 oz)
- Add 10-15% for mixing container residue
Always mix more than calculations suggest. Running short mid-project creates visible seams when you mix a second batch.
Preventing Common Problems
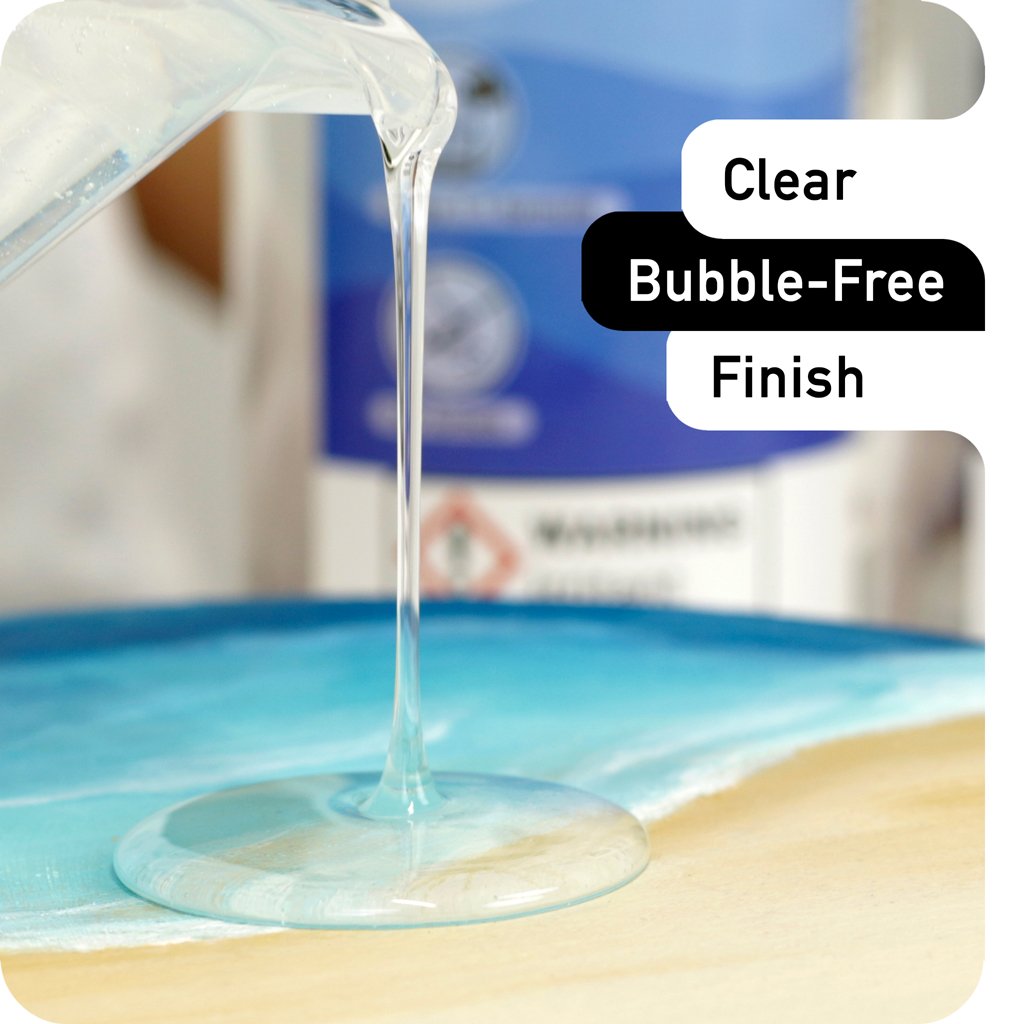
Air bubbles in layered work: More layers mean more opportunities for bubbles. Heat-treat each layer thoroughly before adding subsequent pours.
Adhesion failures: Dust or contaminants between layers prevent bonding. Lightly sand cured layers with 220-grit sandpaper before adding new resin.
Color bleeding: Unsealed porous materials leach pigment into clear resin. Always seal papers, fabrics, and raw wood before resin application.
Warping or curling: Thin substrates curl under epoxy weight. Use rigid backing boards or panel surfaces for dimensional artwork.
Surface Finishing Options
Most mixed media resin art needs minimal finishing beyond the final pour. The self-leveling properties create naturally smooth surfaces.
For pieces with deliberately rough or sculpted surfaces, consider these approaches:
- Light sanding with fine grits (400-1000) followed by polishing
- Additional thin clear coat to restore a glossy finish after sanding
- Matte spray sealer for non-reflective surfaces (applied after full cure)
- Leaving texture as-is for tactile dimensional interest
Choose finishing based on your artistic vision rather than assuming everything needs perfect gloss.
Frequently Asked Questions
Can I use epoxy resin over watercolor paintings in mixed media art?
Yes, but watercolors require careful sealing first because they're water-soluble and can reactivate when resin is applied. Use multiple thin coats of spray fixative or workable fixative, letting each coat dry completely before applying the next. Test on a sample watercolor section if possible.
Once properly sealed, apply a thin seal coat of epoxy, wait for full cure, then add your final protective layer. Clear Resin formulas work excellently over sealed watercolors without causing running or bleeding.
What materials should I avoid embedding in epoxy resin?
Avoid fresh organic materials with moisture content (fresh flowers, fruits, leaves) as they'll rot inside resin. Food items, unless completely dehydrated, will decompose. Certain plastics melt or warp from the resin's exothermic heat during curing. Photographs printed with dye-based inks may run; use laser prints or pigment inks instead.
Materials that off-gas (fresh wood, uncured clay) can create bubbles. Water-based or wet materials of any kind will prevent proper curing and cause permanent cloudiness.
How do I create professional-looking edges on mixed media resin pieces?
Use painter's tape as a temporary dam around your work surface perimeter, removing it 4-6 hours after pouring when resin has gelled but not fully hardened. Alternatively, intentionally allow overflow, then trim cured edges with a rotary tool, router, or table saw for perfectly clean lines.
Sand cut edges smooth with progressive grits (220, 400, 600), then polish or apply a thin clear coat to restore gloss. Frame pieces to hide edges entirely, or coat edges with additional resin for an all-over glossy finish.
How thick can I pour epoxy over textured mixed media surfaces?
Standard art resin safely pours up to 1/4 inch thick in single applications. For highly textured surfaces with elements protruding 1/2 inch or more, build up coverage through multiple pours rather than one thick application. Let each layer cure 24-48 hours before adding more.
Deep pour formulas allow 1-2 inch pours but cure more slowly. Very tall elements might need 3-4 separate pours to fully encase. Temperature management becomes critical with thick pours-work in climate-controlled spaces around 70-75°F.
What's the best way to incorporate metal leaf into resin artwork?
Apply metal leaf (gold, silver, or copper) to your sealed substrate using leaf adhesive or acrylic medium, following the manufacturer's directions. Let adhesive cure completely-this is critical. Seal the applied leaf with a thin barrier coat of shellac or acrylic sealer to prevent tarnishing reactions with epoxy.
After the sealer dries, apply your first thin resin coat to encapsulate the leaf. Once cured, add additional dimensional pours as desired. Unsealed metal leaf can oxidize or discolor when exposed to epoxy, ruining the effect you're trying to create.
Can I mix different types of adhesive materials with epoxy in one artwork?
Generally, yes, but ensure all other adhesives are fully cured before applying epoxy. White glue, super glue, and construction adhesive all work fine under resin once completely dry. Hot glue can soften from epoxy's curing heat; use sparingly.
Silicone adhesive prevents epoxy adhesion and creates bare spots, so avoid applying resin to these areas. Plan your material combinations carefully, using traditional adhesives for initial assembly and epoxy as the final encapsulation and protective layer.
Create Your Next Mixed Media Masterpiece
Combining multiple materials into a cohesive artwork demands reliable epoxy that bonds everything securely while maintaining crystal clarity. Your creative concepts deserve formulas that won't yellow, cloud, or fail after months of work.
Clear Resin provides the professional-grade quality your mixed media art needs-superior adhesion across diverse materials, UV protection that preserves colors and prevents degradation, and self-leveling properties that create flawless finishes. Start your next dimensional project with confidence using Clear Resin today.