The Clear Resin Puzzle Enthusiasts Trust

Spending hours, sometimes days, completing a challenging jigsaw puzzle only to break it apart feels wrong to many people. The satisfaction of placing that final piece deserves more than a quick photo before dismantling your work.

Epoxy resin transforms completed puzzles into permanent art pieces you can frame, hang, or display. Clear Resin formulas are specifically designed for puzzle preservation, creating a glass-like protective coating that holds every piece in place while maintaining the original colors and details of your completed image.

What makes epoxy the best solution for puzzle preservation?

1. Permanent bonding that keeps all pieces locked together forever

2. Crystal transparency that doesn't cloud or yellow over time

3. Protective coating against dust, moisture, and handling damage

4. Self-leveling properties that create smooth, professional finishes

The Problem with Traditional Methods

Puzzle glue exists, sure. But it often dries cloudy, leaves visible brush strokes, and doesn't provide real structural integrity. The puzzle remains fragile and susceptible to warping or separating if handled roughly.

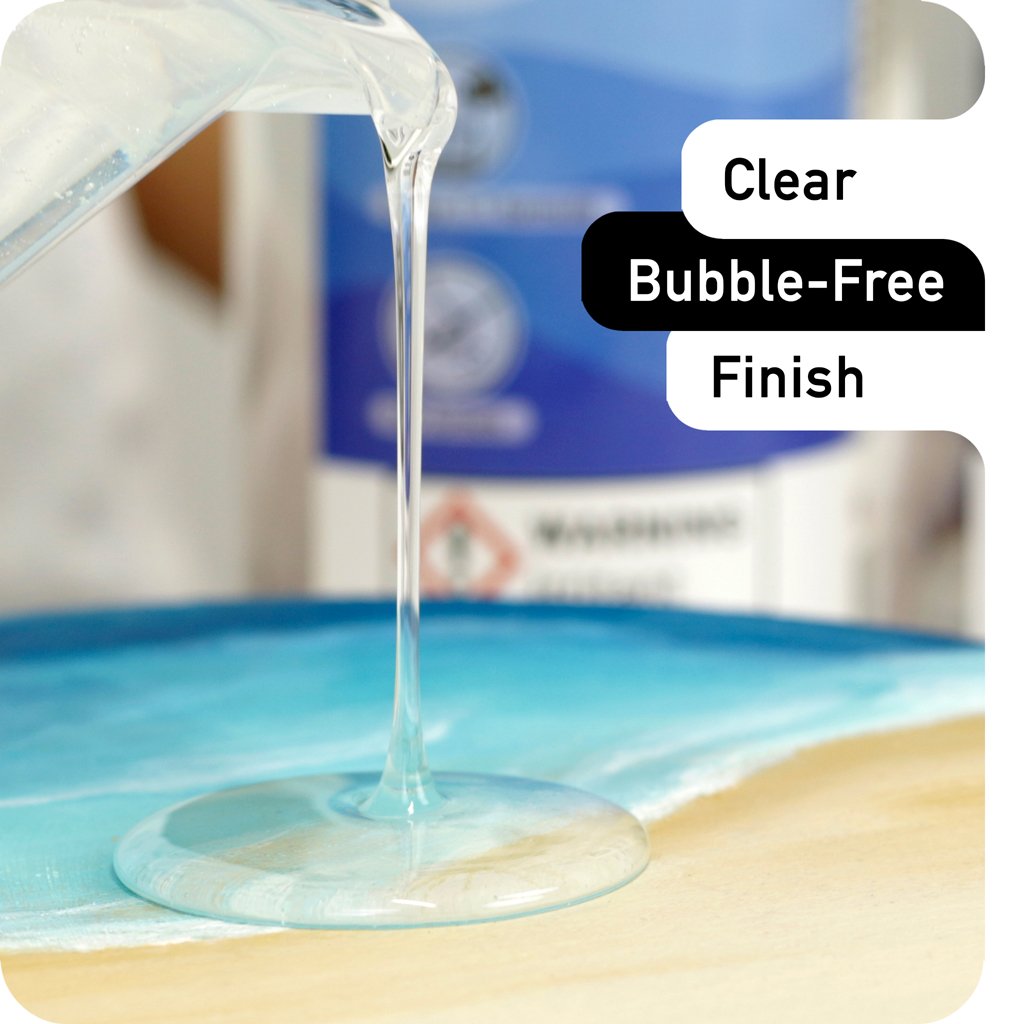
Epoxy creates a rigid, protective shell. Your finished puzzle becomes a solid piece of artwork, not just glued cardboard that might come apart later. This matters especially for large puzzles or those you plan to move or ship.

Preparing Your Puzzle for Resin Application

Completing the Puzzle Properly

Before you even think about resin, how you complete the puzzle matters. Work on a flat, stable surface that you can leave undisturbed for several days. Moving a puzzle mid-process risks separating pieces.

A mounting board underneath your puzzle from the beginning simplifies the entire preservation process. Foam board, poster board, or specialized puzzle boards all work well. The board provides stability during assembly and becomes the permanent backing after resin application.

Important consideration: If you assembled your puzzle on a table without backing, you'll need to transfer it carefully to a board before applying epoxy. This step requires patience-perhaps slide a thin piece of cardboard underneath, section by section, or use the "puzzle roll-up" technique with plastic wrap.

Surface Preparation Steps

Your puzzle surface needs to be completely flat and clean before resin application. Any dust, pet hair, or debris gets permanently sealed under the epoxy coating.

1. Gently brush the surface with a soft, dry paintbrush to remove loose particles

2. Check for gaps between puzzle pieces and press them together firmly

3. Inspect the edges to ensure all perimeter pieces sit flush

4. Wipe with a lint-free cloth for final dust removal

5. Position on a perfectly level surface using a spirit level

Level surfaces matter more than most people realize. Even slight tilts cause resin to pool on one side, creating uneven coating thickness and potentially running off the edges.

Sealing Porous Puzzle Surfaces

Standard cardboard puzzles are porous and absorb liquids. Without proper sealing, epoxy soaks into puzzle pieces unevenly, creating dark patches and depleting your resin supply before you achieve proper coverage.

Apply a thin sealer coat first:

1. Mod Podge or craft glue works for budget-conscious projects

2. Spray sealers provide even coverage without brush marks

3. Thin epoxy coat (applied with foam brush) creates the best base

Let sealer coats dry completely-usually 2-4 hours for glue, 24 hours for thin epoxy-before applying your final resin layer.

Calculating and Mixing Epoxy for Puzzle Projects

How Much Resin Do You Actually Need?

Running out of mixed epoxy halfway through a pour ruins everything. The partially coated puzzle looks terrible, and gelling resin can't be smoothly blended with a fresh batch, so calculating the right quantity upfront based on puzzle dimensions is essential. A 500-piece puzzle at 18 by 24 inches covers 432 square inches and needs 8 to 10 ounces of mixed epoxy.

A 1000-piece puzzle at 20 by 27 inches has 540 square inches of surface area and calls for 12 to 14 ounces. Stepping up to a 1500-piece puzzle at 24 by 33 inches means 792 square inches to cover, requiring 16 to 20 ounces. Large 2000-piece puzzles at 27 by 39 inches span 1053 square inches and need 22 to 26 ounces of mixed epoxy. These amounts assume a standard coating thickness of approximately 1/8 inch, and it's wise to add 10 to 15 percent extra to account for mixing container residue and potential spillage.

Proper Mixing Techniques

Clear Resin uses straightforward 1:1 mixing ratios-equal parts resin and hardener. Measure accurately using a digital scale for best results. Weight measurements prevent the errors that sometimes occur with volume-based measuring.

Mixing process for puzzle projects:

  1. Pour resin component into mixing container
  2. Add an equal weight of hardener component
  3. Stir slowly and deliberately for 3-4 minutes minimum
  4. Scrape the sides and bottom of the container thoroughly while stirring
  5. Transfer to a clean second container and stir another minute (eliminates unmixed residue from container edges)

Don't rush mixing. Incompletely blended epoxy creates soft spots that never fully harden. Set a timer if necessary-those 3-4 minutes feel longer than you'd expect.

Temperature Considerations

Room temperature dramatically affects how resin behaves. Cold resin is thick and difficult to spread. Hot resin thins out but cures too quickly, leaving minimal working time.

Optimal conditions: 70-75°F ambient temperature. If your workspace is cooler, warm the unmixed resin bottles in hot (not boiling) water for 10-15 minutes before mixing. This reduces viscosity and makes pouring easier.

Avoid working in temperatures above 80°F unless you're experienced with fast-curing epoxy. The heat accelerates chemical reactions, potentially causing the mixed resin to gel before you finish spreading it across your puzzle.

Application Techniques for Flawless Results

Initial Pour and Spreading

Start pouring from the center of your puzzle and work outward toward the edges. This technique helps resin self-level naturally while giving you control over distribution.

Pour in a steady stream from about 6 inches above the puzzle surface. Too high and you incorporate excess air bubbles. Too low and you don't get enough flow to spread evenly.

Spreading tools that work well:

  • Foam brushes (disposable and inexpensive)
  • Silicone spatulas (reusable and easy to clean)
  • Plastic spreaders (good for large flat surfaces)
  • Gloved fingers (surprisingly effective for edges)

Guide the resin to cover the entire surface, including edges. Don't be stingy-you want complete coverage over every puzzle piece. The self-leveling properties handle minor unevenness, but you still need adequate volume to work with.

Dealing with Bubbles

Air bubbles are inevitable when coating puzzles. The gaps between pieces, the porous cardboard, and the mixing process all contribute to bubble formation.

Address bubbles in stages:

During pouring (0-10 minutes): Many bubbles rise naturally as resin settles. Just wait, and watch-patience pays off here.

Active bubble removal (10-30 minutes): Pass a heat gun or propane torch across the surface. Hold it 6-8 inches away and keep it moving constantly. You'll see bubbles pop instantly. Don't hold heat in one spot or you'll scorch the puzzle image underneath.

Final check (30-60 minutes): Look from different angles under good lighting. Catch any remaining bubbles before the resin gels too much for heat treatment to work.

Some tiny bubbles might remain visible. Honestly? Most people won't notice them unless they're looking closely. Perfectionism is admirable, but don't stress over microscopic imperfections.

Edge Treatment and Containment

Resin wants to flow. Puzzle edges without barriers result in drips running down the mounting board sides.

Options for containing edges:

  1. Tape barrier: Apply painter's tape around the perimeter of the puzzle, slightly overlapping onto the mounting board. Remove the tape after 4-6 hours, when the resin has gelled but not fully hardened.
  2. Dam method: Build a temporary barrier with foam board strips or wooden pieces clamped around the puzzle. Remove after full cure.
  3. Acceptance method: Let the resin flow over the edges naturally, then trim the excess with a saw or rotary tool after curing. This works if you're framing the puzzle, and the edges won't be visible.

I've seen all three methods work well. Choose based on your comfort level and final display plans.

Creating Depth with Multiple Layers

Single thick pours work fine for basic preservation. But layering creates dimensional effects that really make puzzle art stand out.

Two-layer technique:

  • First layer: Thin flood coat (1/16 inch) that fills gaps between pieces
  • Second layer: Thicker dome coat (1/8 inch) applied 24-48 hours later for glass-like depth

Three-layer approach:

  • Base seal coat (very thin)
  • Middle structural layer (standard thickness)
  • Final dome coat (generous pour for maximum depth)

Each additional layer adds cure time and material cost, but the visual impact can be worth it for special puzzles or gift pieces.

Post-Application Care and Display Options

Curing Timeline and Handling

During the first 24 hours after pouring, you can observe the puzzle and briefly remove the dust cover to check progress, but avoid touching, moving, or drilling the piece at all costs. Between 24 and 48 hours, it's safe to carefully lift the puzzle to check the underside, though framing and applying any kind of pressure should still be avoided. 

From 48 to 72 hours, the puzzle can be moved to a different location, but heavy handling and cutting remain off-limits. After 72 hours, the resin is fully cured and the puzzle is ready for framing, drilling mounting holes, or trimming edges. At that point, there's nothing left to avoid.

Dust and Contamination Prevention

Wet epoxy attracts airborne particles like a magnet. Every speck of dust, pet hair, or insect that lands on the surface becomes a permanent inclusion.

Cover curing puzzles with a cardboard box propped up on supports, creating a dust tent. Don't seal completely; resin releases fumes during cure that need ventilation. Just block drifting particles.

Keep pets out of your workspace during the cure period. Cat hair on glossy epoxy is particularly frustrating to deal with.

  • Gallery wrap

    Coat the edges of the mounting board with resin too, creating an all-around glossy finish suitable for hanging without a frame.

  • Direct frame mounting

    If your puzzle dimensions match standard frame sizes, simply place the resin-coated puzzle in a frame with or without glass. The epoxy coating provides protection, so glass becomes optional.

  • Custom backing board

    Attach the puzzle to a decorative backing board that extends beyond puzzle edges, creating a border effect. Mount the entire assembly in an appropriately sized frame.

  • Floating mount

    Use standoffs or foam spacers to mount the puzzle slightly away from the wall, creating shadow depth. This modern approach works especially well for minimalist spaces.

Whichever method you choose, ensure mounting hardware attaches to the board-never drill through the puzzle pieces themselves.

Troubleshooting Common Issues

Tacky or Soft Spots After Curing

If sections remain sticky 72+ hours after pouring, something went wrong with mixing or ratios. Unfortunately, there's no easy fix once epoxy is partially cured.

Options for dealing with uncured spots:

  • Additional heat: Place the puzzle in a warmer location (75-80°F) for another 48 hours. Sometimes this jump-starts incomplete curing.
  • Sand and recoat: Sand the tacky areas gently, clean thoroughly, and apply a fresh coat of properly mixed epoxy over the problem zones.
  • Complete removal: Worst-case scenario-scrape off all epoxy and start fresh. This damages the puzzle surface, but salvages the puzzle for another attempt.

Prevention beats cure here. Always measure accurately, mix thoroughly, and use fresh (not expired) epoxy components.

Cloudiness or Yellowing

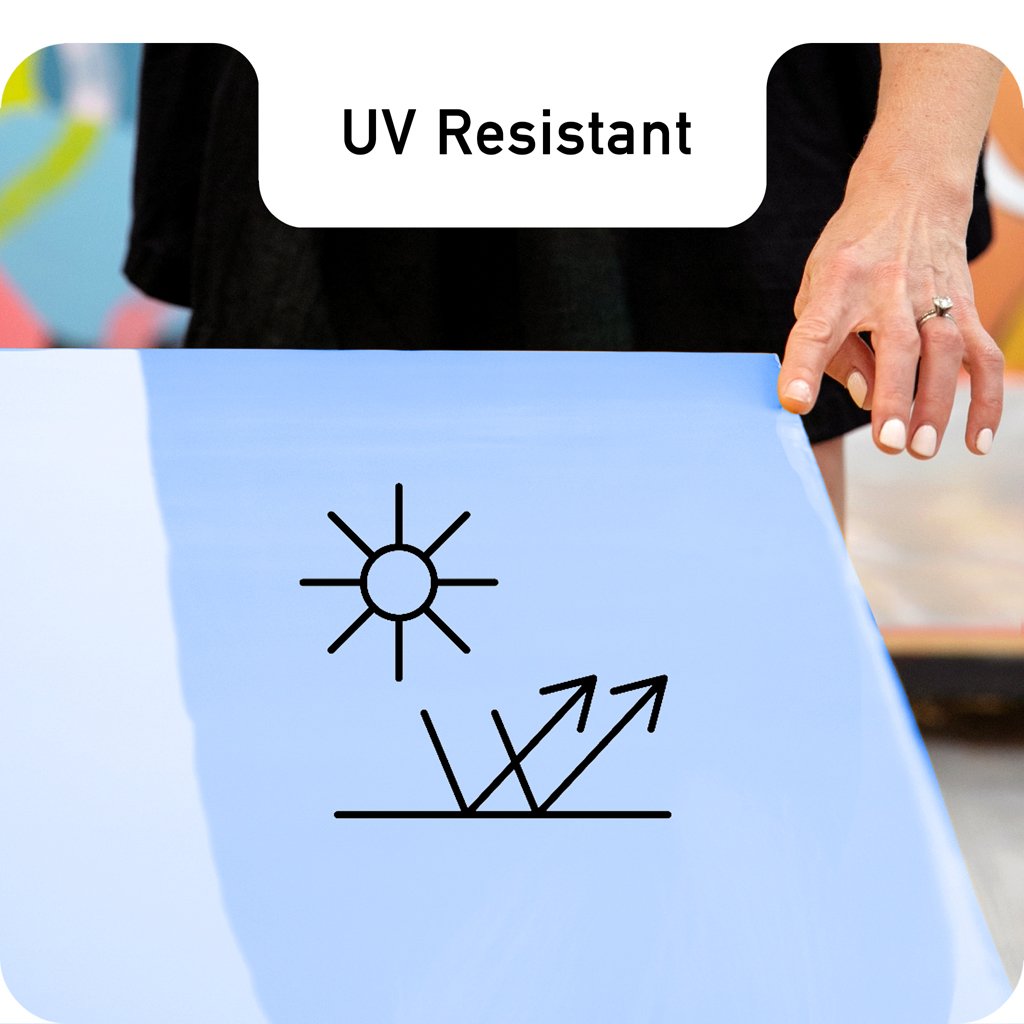
Cloudiness usually results from moisture contamination or high humidity during cure. Yellowing indicates UV degradation or low-quality epoxy without proper stabilizers.

Clear Resin formulas include UV inhibitors that prevent yellowing even years after application. If you're experiencing cloudiness:

  • Check workspace humidity levels (should be below 60%)
  • Ensure the puzzle and board were completely dry before resin application
  • Verify resin components weren't contaminated with water

Yellowing from UV exposure? Keep displayed puzzles out of direct sunlight. Even UV-resistant formulas perform best under indirect lighting conditions.

Learn More

Uneven Thickness or Pooling

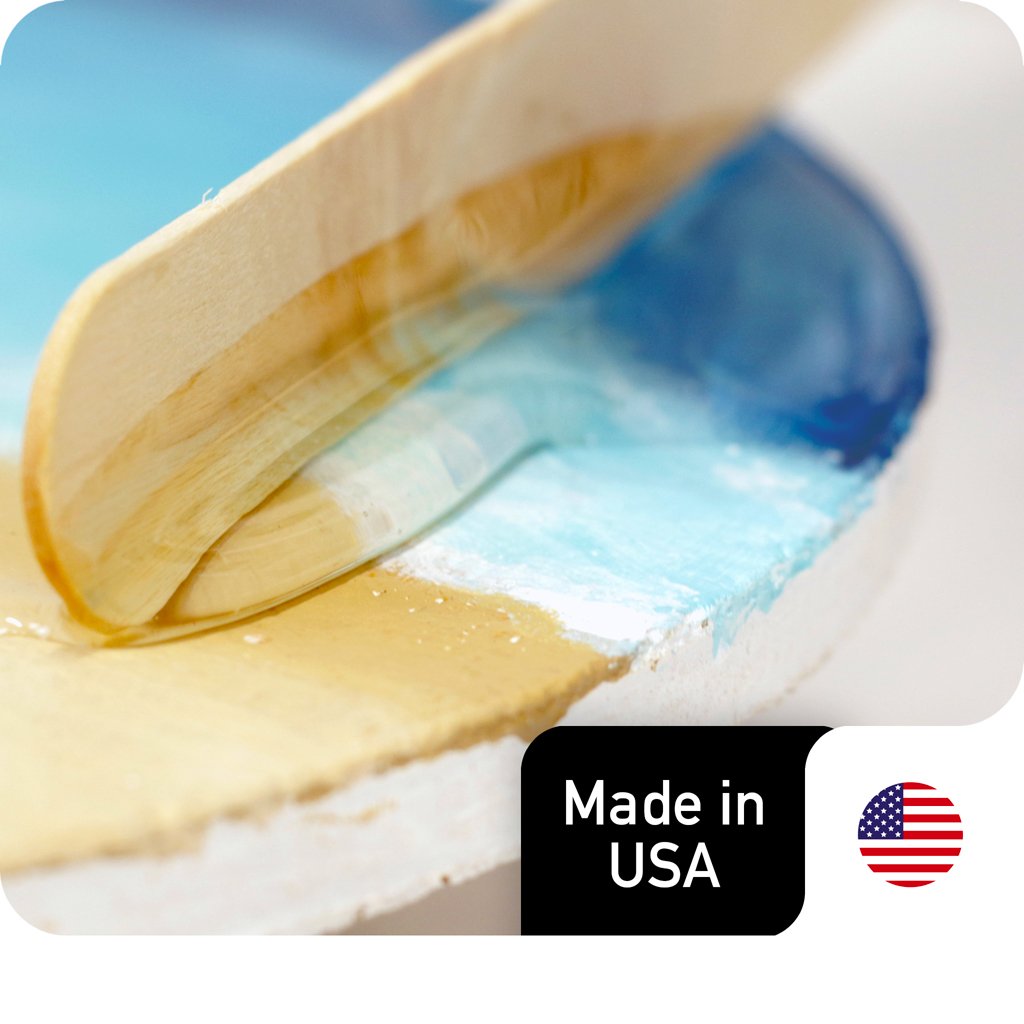
This happens when the work surface isn't level. Gravity pulls liquid resin toward the lowest point, creating thick areas and thin areas.

Check levelness before pouring-use a bubble level on your work surface. Even small tilts become obvious once the resin settles.

If you notice pooling during application, you have maybe 30-45 minutes to fix it. Redistribute excess resin from pooled areas to thin sections using a spreader or foam brush. Work quickly but calmly.

Bubbles That Won't Pop

Some bubbles stubbornly resist heat treatment. These usually originate from between puzzle pieces, where trapped air escapes slowly over time.

Persistent bubbles sometimes require manual intervention:

  • Use a toothpick or needle to puncture bubble membranes
  • Apply additional heat immediately after puncturing
  • Accept that some tiny bubbles add character (controversial opinion, I know)

Really, though, a few small bubbles scattered across a large puzzle rarely detract from the overall appearance. Viewers notice the completed image, not microscopic imperfections.

Frequently Asked Questions

Can I apply epoxy resin to puzzles with missing pieces?

Yes, though the gaps in the missing pieces will be visible through the clear resin coating. Some crafters intentionally leave strategic pieces out to create unique negative space effects.

If you want to fill gaps completely, cut replacement pieces from cardboard, paint them to match the surrounding colors, and position them before applying epoxy. The resin will hold everything in place and blend the repair into the overall image somewhat convincingly.

What type of board works best as puzzle backing?

Foam core board offers the best combination of rigidity, light weight, and affordability for most puzzle sizes. It's thick enough to prevent warping under resin weight but thin enough for standard frames. Poster board works for smaller puzzles but may warp with larger applications.

Hardboard or plywood provides maximum stability for very large puzzles but adds significant weight. Choose based on puzzle dimensions and whether you'll hang or lean the finished piece.

How do I prevent epoxy from running off puzzle edges?

Create a temporary barrier using painter's tape applied around the perimeter, overlapping slightly onto your mounting board. Alternatively, build a dam from foam board strips positioned around the edges and secured with clamps or hot glue. Remove barriers after the epoxy gels (4-6 hours) but before full cure.

Some crafters simply allow controlled overflow, then trim dried excess with a utility knife or rotary tool after complete curing.

Can I add glitter or other decorative elements to puzzle resin?

Absolutely. Sprinkle glitter, metallic flakes, or small decorative elements onto the wet epoxy surface within the first 20-30 minutes after pouring. They'll suspend in the resin as it cures. For heavier additions like small charms or dimensional embellishments, wait until the resin reaches a gel state (tacky but not liquid) before placing them-this prevents sinking.

Consider how additions interact with the puzzle image underneath; subtle accents usually work better than heavy coverage.

How long does resin-coated puzzle art last?

When properly applied with UV-resistant epoxy formulas like Clear Resin, puzzle art can last decades without yellowing, clouding, or deterioration. The epoxy creates a protective barrier against moisture, dust, and handling damage that would normally degrade cardboard puzzle pieces over time.

Display in indoor conditions away from direct sunlight for maximum longevity. Outdoor display isn't recommended even with UV protection, as extreme temperature fluctuations can eventually cause backing board warping.

What's the difference between puzzle glue and epoxy resin?

Puzzle glue is a thin, water-based adhesive that bonds pieces together but provides minimal protection or structural reinforcement. It often dries with a matte or slightly cloudy finish and doesn't prevent warping. Epoxy resin creates a thick, glass-like protective coating that both bonds and seals the puzzle. Resin provides superior clarity, scratch resistance, and long-term preservation.

While puzzle glue costs less initially, epoxy delivers professional, gallery-quality results worth the investment for puzzles you want to display permanently.

Transform Your Puzzle Achievements Into Lasting Art

Hours of careful puzzle assembly deserve permanent display. Don't settle for methods that leave your completed work vulnerable to damage, fading, or disassembly.

Clear Resin's professional-grade formulas give your puzzle art the crystal-clear protection and gallery-worthy finish it deserves. Our UV-resistant epoxy prevents yellowing while our self-leveling properties create smooth, flawless surfaces every time. Start preserving your puzzle masterpieces today.