Clear Resin for Creating Custom Jewelry Pieces

Creating wearable art requires materials that deliver both beauty and durability. Epoxy resin offers jewelry makers something traditional metalworking or beading can't-the ability to suspend flowers, glitter, photographs, or custom color blends in crystal-clear permanent displays.

Clear Resin formulas are specifically designed for jewelry applications where clarity, strength, and long-term wearability matter. Whether you're crafting pendants for an Etsy shop or creating one-of-a-kind pieces for friends, the right epoxy transforms simple molds into professional-quality jewelry.

What makes epoxy ideal for jewelry creation?

1. Crystal transparency that showcases embedded elements perfectly

2. High-gloss finish without additional polishing steps

3. UV resistance that prevents yellowing from daily wear

4. Strong durability for pieces that withstand regular handling

5. Versatile compatibility with pigments, inks, and inclusions

6. Easy 1:1 mixing ratios that eliminate complicated measurements

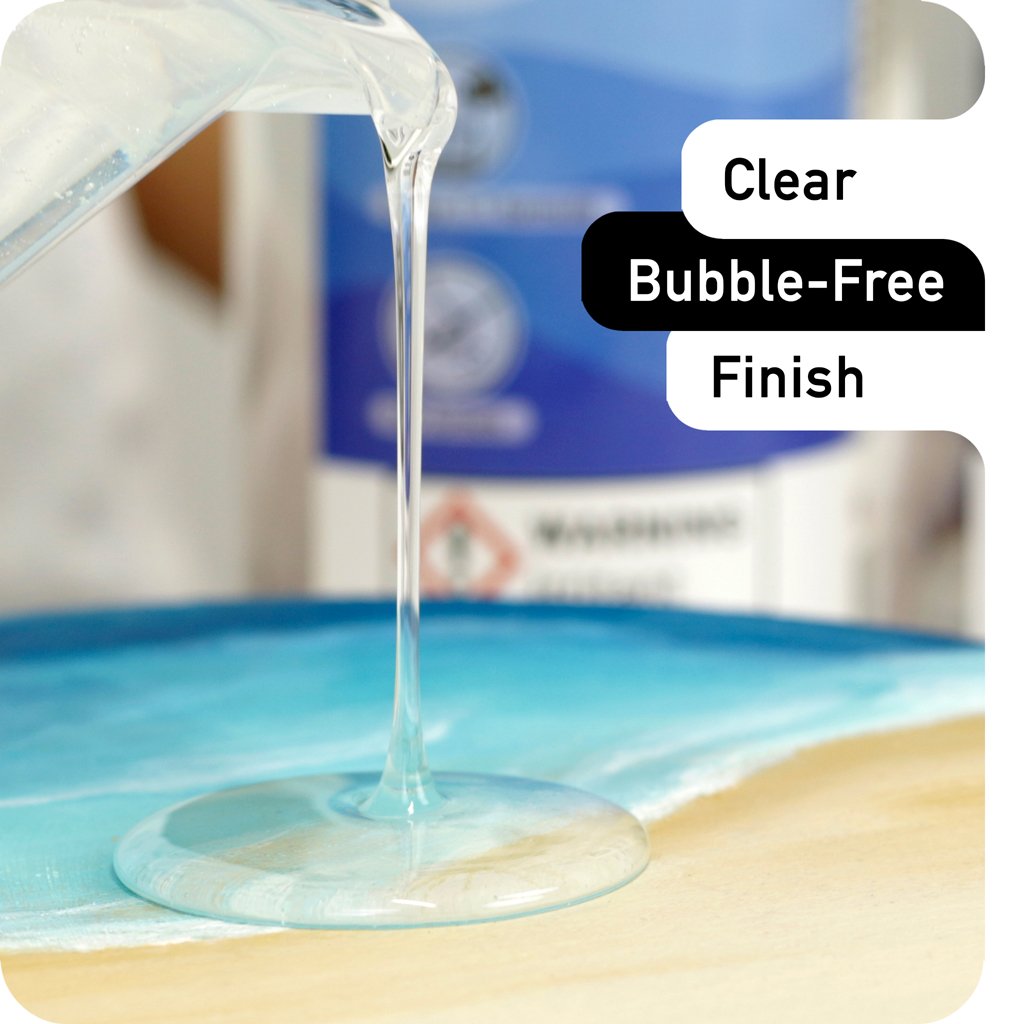
The Advantage Over UV Resin

UV resin cures under special lamps in minutes, which sounds convenient. But it has limitations for serious jewelry making. UV formulas yellow more quickly, work only in shallow depths (typically under 1/4 inch), and require expensive curing equipment.

Epoxy resin cures through chemical reaction without equipment. You get deeper pours, better clarity over time, and more working flexibility. Yes, cure times are longer, but the quality difference shows in finished pieces.

Essential Supplies and Starter Kit Components

What a Complete Resin Kit Should Include

Starting jewelry making without proper supplies leads to frustration. Clear Resin kits provide everything you need except creative inclusions-those personal touches that make your pieces unique.

Core kit components:

- Epoxy resin and hardener in beginner-friendly quantities

- Accurate measuring cups with clear markings

- Disposable mixing sticks or reusable silicone spatulas

- Protective gloves (nitrile works better than latex)

- Basic instructions with mixing ratios and cure times

Expanded kits might add silicone molds, pigments, or glitter to get you creating immediately. That's helpful if you want to test the process before investing in specialized molds.

Mold Selection for Different Jewelry Types

Silicone molds determine your jewelry shapes and sizes. Quality molds release cured pieces cleanly and last through dozens of uses, while cheap molds tear after a few projects or leave rough edges requiring extensive finishing.

Pendant molds, sized between 1 and 2 inches, work well for necklaces and bag charms and support high levels of detail. Earring molds are smaller at 0.5 to 1 inch and demand very high detail, since any imperfection shows up clearly on small wearable pieces. Ring molds come in various band widths, suit both stackable and statement styles, and offer medium detail. Bracelet component molds, ranging from 0.5 to 1.5 inches, are used for links and charms with medium-high detail.

Multi-cavity molds vary in size and are designed for production work, where consistent sizing across pieces matters more than anything. Across all types, look for molds with smooth interiors, because any texture or imperfection in the mold transfers directly to your finished jewelry. Professional results require professional-quality molds.

  • Heat source (torch or heat gun)

    Absolutely necessary for removing surface bubbles. A small kitchen torch costs less than resin-specific tools and works perfectly.

  • Resin mixer

    Hand-stirring works fine for small batches. Electric stirrers reduce arm fatigue for production work and ensure thorough blending.

  • Tweezers and toothpicks

    Position small inclusions precisely. Tweezers with fine tips work best for delicate elements like dried flowers or tiny beads.

  • Silicone work mat

    Protects your workspace and makes cleanup effortless. Cured epoxy peels right off silicone surfaces.

  • Digital scale

    More accurate than volume measurements, especially for consistent color batching when you find combinations you love.

  • Bezels and findings

    Jump rings, earring posts, bail findings, and chain. You'll need hardware to convert molded pieces into wearable jewelry.

Mixing and Pouring Techniques for Jewelry

Getting Ratios Right Every Time

Most jewelry-grade epoxy uses 1:1 mixing ratios by volume or weight. Equal parts resin and hardener. Simple, right? Yet incorrect ratios cause more failures than any other mistake.

Measure carefully using graduated cups or digital scales. "Close enough" doesn't work with epoxy chemistry. Too much resin leaves tacky surfaces. Too much hardener creates brittle pieces prone to cracking.

Proper mixing sequence:

  1. Pour resin component into a clean mixing cup
  2. Add an exactly equal amount of hardener
  3. Stir slowly and deliberately for 3-4 full minutes
  4. Scrape sides and bottom while stirring
  5. Transfer to a second clean cup (eliminates unmixed residue)
  6. Stir another 30-60 seconds in the new container

Don't rush mixing. Those 3-4 minutes feel long, but incompletely mixed epoxy creates permanent soft spots or cloudy areas.

Working with Color and Pigments

Clear jewelry showcases inclusions beautifully. Colored resin creates entirely different aesthetic possibilities-opaque solids, translucent tints, or metallic effects.

Popular colorant options:

  • Alcohol inks: Create transparent colors with organic flow patterns
  • Resin-specific pigments: Opaque coverage in small amounts
  • Mica powders: Metallic and pearlescent finishes
  • Liquid dyes: Intense transparent colors
  • Acrylic paint: Works but can affect curing if overused (stay under 5%)

Start with tiny amounts-seriously, a toothpick-tip of pigment often colors an entire ounce of mixed resin. You can always add more, but you can't remove excess color.

Mix colorants thoroughly before pouring into molds. Swirls and marbling happen naturally if you pour multiple colors together, but unintentional streaking looks unprofessional.

Embedding Inclusions Successfully

Dried flowers, glitter, small photographs, pressed leaves, tiny shells-almost anything dry and lightweight embeds successfully in resin jewelry.

Key principles for inclusion:

Ensure complete dryness. Moisture causes cloudiness, prevents proper curing, or leads to decomposition inside the resin. Dry flowers thoroughly using silica gel or a flower press before embedding.

Consider weight and positioning. Heavy items sink in liquid resin. Either let resin reach gel state (tacky but not liquid) before placing heavy inclusions, or build up layers, seal the bottom with resin, let cure, position the item, then pour the top layer.

Seal porous materials first. Papers, fabrics, or dried plants absorb epoxy and darken unless sealed. Brush on thin mod podge or spray fixative, let dry completely, then embed.

Bubble Prevention and Removal

Tiny bubbles ruin jewelry pieces. At a small scale, imperfections become much more visible than in larger craft projects.

Multi-stage bubble control:

During mixing (0-5 minutes): Stir slowly. Fast stirring whips in the air. Slow, deliberate stirring incorporates components without excess bubbles.

After pouring (5-15 minutes): Let molds sit undisturbed. Many bubbles rise naturally as resin settles. Patience here pays dividends.

Active removal (10-30 minutes): Pass the heat source quickly over the molds. Watch bubbles pop instantly. Keep heat moving-don't hold it over one spot, or you'll scorch the resin or melt silicone.

Final check (30-60 minutes): Look from different angles under good light. Catch stragglers before resin gels too much for heat treatment.

Some artists pour epoxy into a pressure pot, which forces bubbles to compress into invisibility. That's an advanced technique requiring investment, but worth considering for professional production work.

Creating Different Jewelry Styles

Pendants and Necklace Pieces

Pendant molds range from simple geometric shapes to intricate designs with fine details. Larger pendants (1.5-2 inches) make bold statement pieces. Smaller, delicate pendants (0.5-1 inch) suit minimalist aesthetics.

Layer different effects for visual interest:

  1. Base layer: Pour clear or lightly tinted resin, add flat inclusions like pressed flowers
  2. Wait for gel state: Let base firm up but remain slightly tacky
  3. Dimensional layer: Add glitter, beads, or small charms
  4. Top coat: Pour the final clear layer for depth and protection

Cure times between layers typically run 4-6 hours at room temperature. Plan multi-day projects for complex layered pendants.

Install bail findings (the loop that holds the chain) after full cure. Drill small holes if needed, using sharp bits at slow speeds, or use glue-on bales for simplicity.

Earring Creation Tips

Earrings require matching pairs, which means consistent processes. Weigh or measure inclusions to ensure both pieces contain similar amounts. Mix enough colored resin for both earrings simultaneously-matching colors across separate batches is nearly impossible.

Pour both earring molds simultaneously from the same mixing cup. This guarantees color consistency and eliminates subtle variations that look mismatched when worn.

Earring-specific considerations:

  • Weight matters for comfort (keep pieces small and thin)
  • Symmetry expectations are higher than pendants
  • Consider front and back appearance (both sides show)
  • Attach findings securely (earrings experience more stress than pendants)

Post-style findings work well for studs. Drill holes for fishhook or lever-back styles after pieces cure completely. Use jewelry-grade adhesive in addition to mechanical attachment for maximum security.

Statement Rings and Bands

Ring molds come in various band widths and styles. Some create complete rings in single pours. Others make decorative tops you mount on adjustable band blanks.

Sizing accuracy matters tremendously. Too tight and the rings won't fit. Too loose and they spin or slide off. Most ring molds indicate finished sizes-verify against ring sizing charts before committing to designs.

Consider wearability during design:

  • Avoid sharp corners or points that catch on clothing
  • Keep dimensional elements low-profile to prevent snagging
  • Test comfort before adding expensive inclusions
  • Remember rings experience more impact than other jewelry

Clear Resin's durable formula withstands daily ring wear better than craft-grade alternatives. But even high-quality epoxy can crack under extreme impact-advise customers to remove rings before activities like weightlifting or rock climbing.

Bracelet Components and Links

Creating full bracelets requires either specialized molds or assembling multiple smaller components. Component-based approaches offer more flexibility-mix colors, patterns, or inclusion types across different links.

Link molds typically include holes for jump rings or wire connections. Plan your assembly method before pouring-some designs need specific hole placements or sizes.

Assembly approaches:

  • Jump ring connections: A traditional jewelry technique that allows for flexible movement
  • Wire wrapping: Artistic approach, adds handmade character
  • Elastic cord: Simple stretch bracelets using beaded components
  • Chain integration: Mix resin links with metal chain segments

Match hardware finishes to your resin design aesthetic. Gold-tone findings pair beautifully with warm-colored resins. Silver-tone suits cool or neutral palettes.

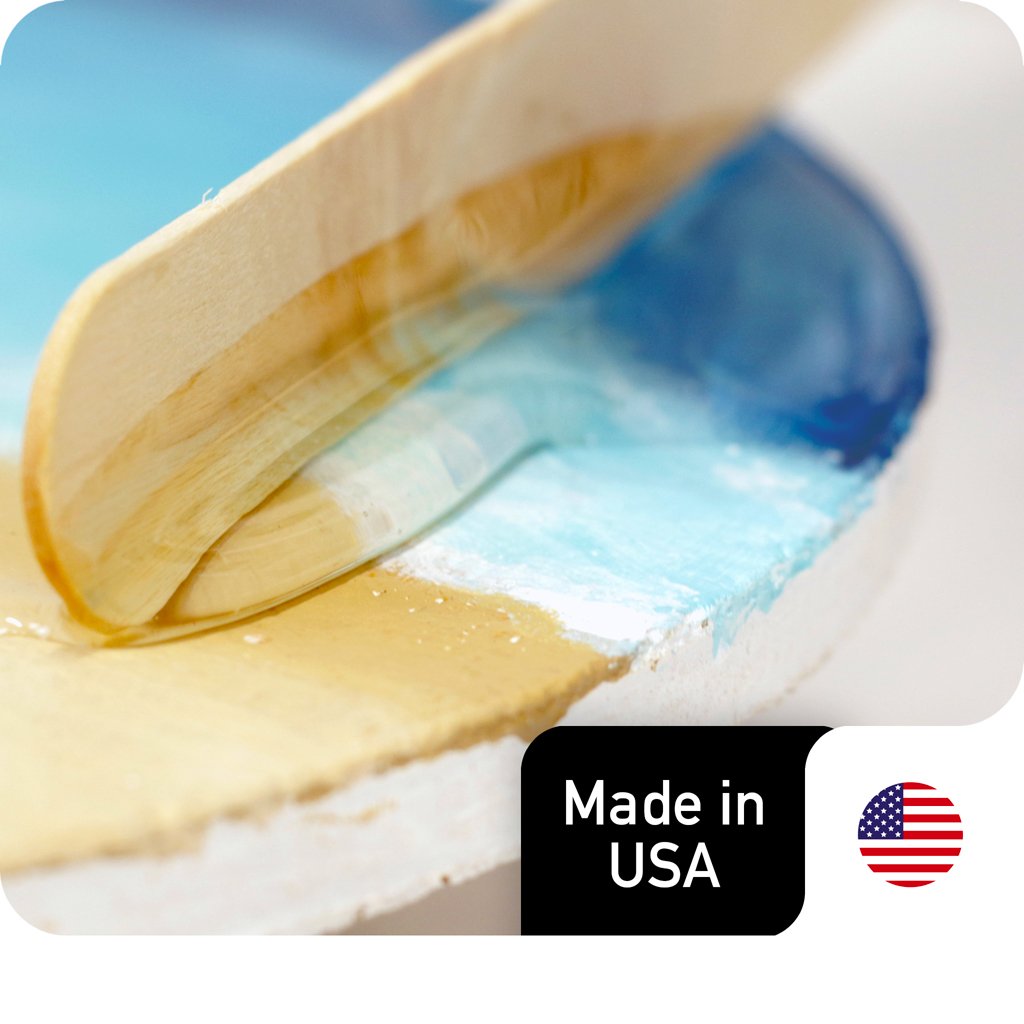
Curing, Demolding, and Finishing

Understanding Cure Stages

Epoxy progresses through distinct stages during curing, and knowing these stages helps you work efficiently and avoid mistakes. In the liquid stage, which lasts from 0 to 30 minutes after mixing, the resin is fully pourable and self-levels, giving you the window to pour, add inclusions, and pop bubbles.

The gel stage follows at 4 to 8 hours, when the resin becomes tacky and holds its shape; this is when you can add dimensional elements or remove tape barriers. Between 12 and 18 hours, the resin reaches the leather-hard stage, firm but still slightly flexible, which is when careful demolding is possible and holes can be drilled with caution. Full cure sets in at 72 hours or more, when the piece is completely hard and at maximum strength, ready for polishing, attaching findings, and selling or wearing.

Room temperature dramatically affects these timings. Warmer spaces between 75 and 80°F speed curing, while cooler rooms below 65°F can double cure times or prevent complete hardening altogether.

Safe Demolding Practices

Rushing demolding damages both your jewelry piece and your silicone mold. Wait until resin reaches at least the leather-hard stage, preferably full cure for delicate or detailed pieces.

Demolding technique:

1. Gently flex the mold away from the edges

2. Work around the perimeter, releasing one section at a time

3. Support the piece from underneath as it releases

4. Don't pull or yank-patient pressure works better

5. If resistance continues, wait another 12-24 hours

Some molds release more easily than others. Temperature affects this too; slightly warm molds (left in a sunny spot for 30 minutes) often release more easily than cold ones.

Finishing and Polishing Options

Most Clear Resin jewelry needs minimal finishing. The high-gloss cure produces naturally shiny surfaces straight from the mold.

For pieces requiring work:

Minor edge cleanup: Use fine-grit sandpaper (400-600 grit) on rough spots. Sand under running water to prevent scratching from loose particles.

Restoring shine after sanding: Progress through increasingly fine grits (400, 600, 800, 1000, 2000), then polish with automotive polishing compound or apply a thin, clear topcoat.

Drilling holes: Work slowly with sharp bits. Support piece from underneath. Drill from both sides to meet in the middle for cleaner holes.

Surface imperfections: Minor flaws sometimes polish out. Deeper issues might require a completely clear topcoat application-essentially a thin resin layer over the cured piece.

Consider whether imperfections add character or detract from quality. Handmade jewelry shows small irregularities-that's part of its charm. But bubbles, cloudiness, or major flaws justify starting fresh.

Troubleshooting Common Jewelry-Making Issues

Tacky or Uncured Surfaces

If jewelry pieces remain sticky 72+ hours after pouring, something went wrong. Common causes include incorrect mixing ratios, insufficient mixing time, expired materials, or extreme temperatures during cure.

Solutions to attempt:

  • Move pieces to a warmer location (75-80°F) for an additional 48-72 hours
  • If partial curing occurred, lightly sand tacky areas and apply a fresh topcoat
  • Complete failure requires scraping and restarting (unfortunately)

Prevention beats fixing. Always measure accurately, mix thoroughly, check expiration dates on both components, and maintain proper workspace temperature.

Yellowing or Cloudiness

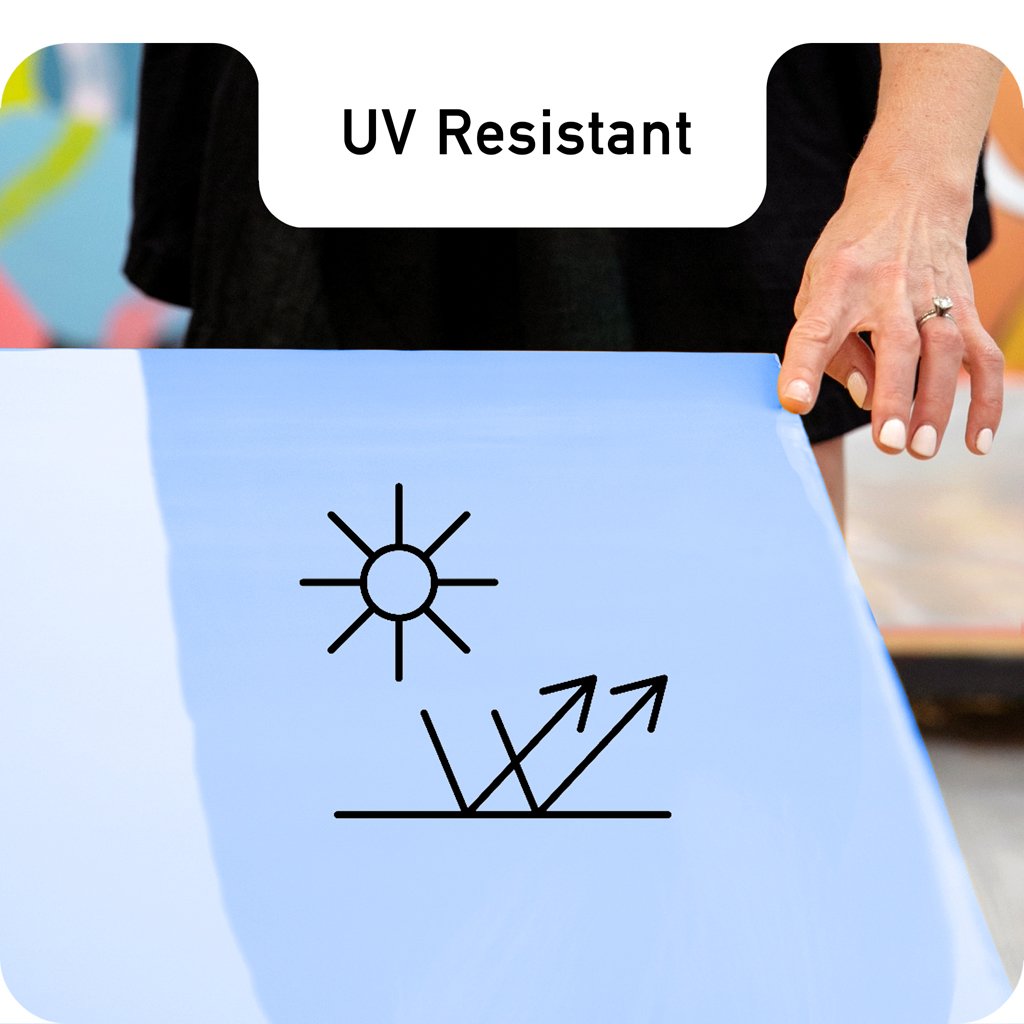
Quality epoxy with UV inhibitors like Clear Resin resists yellowing for years. Cheap formulas yellow within months, particularly problematic for jewelry worn regularly in daylight.

Cloudiness typically indicates moisture contamination. Sources include:

  • Humid workspace during mixing or curing
  • Wet inclusions (insufficiently dried flowers, damp paper)
  • Water droplets in mixing containers
  • Condensation from temperature fluctuations

Work in climate-controlled spaces when possible. Use dehumidifiers if your area has high humidity. Verify all inclusions are bone-dry before embedding.

Mold Staining and Residue

Pigmented resins sometimes stain silicone molds, especially deep colors like reds, purples, or blacks. This doesn't affect mold functionality but can transfer slight tints to subsequent clear pours.

Clean stained molds with isopropyl alcohol on paper towels. For stubborn staining, try acetone (test in an inconspicuous spot first-it can damage some silicones). Some staining becomes permanent but doesn't impact mold performance.

Release spray or powder isn't typically necessary for silicone molds and epoxy. If you're experiencing release difficulties, the issue likely stems from incomplete curing rather than from a need for mold release agents.

Breakage and Durability Concerns

Properly cured epoxy jewelry is quite durable but not indestructible. Thin sections, sharp points, or stress-concentrated regions can break under impact.

Design with durability in mind:

  • Maintain minimum thickness (at least 1/8 inch for pendants)
  • Round corners rather than sharp angles
  • Avoid thin projections that might snap
  • Consider stress points where findings attach

If pieces break frequently, consider whether your curing conditions are optimal. An incomplete cure produces brittle results. Very cold curing temperatures can also reduce final strength.

Frequently Asked Questions

What's the difference between jewelry epoxy and craft epoxy resin?

Jewelry-specific epoxy formulas prioritize crystal clarity, minimal yellowing, and compatibility with small, detailed molds. They typically have lower viscosity for better flow into intricate designs and longer working times for precise placement of inclusions.

Craft epoxy works for jewelry but may not achieve the same professional clarity or long-term UV resistance. Clear Resin formulas are engineered for jewelry applications, offering superior transparency and durability compared to general-purpose craft resins that might work adequately but lack specialized performance characteristics.

Can I speed up resin curing time for faster jewelry production?

Gentle warmth accelerates curing without compromising quality. Place molds in a warm area (75-80°F) or use a heating mat designed for resin work. Avoid extreme heat-temperatures above 85°F can cause too-rapid curing that traps bubbles or creates surface imperfections.

Fast-cure formulas exist but sacrifice working time and often produce inferior clarity. For production work, create batching systems that pour multiple pieces over several days rather than rushing individual cure cycles. Patience produces better results than speed.

How do I prevent my resin jewelry from turning yellow over time?

Choose epoxy formulas with UV stabilizers specifically designed for jewelry applications. Clear Resin includes advanced UV inhibitors that maintain crystal clarity for years under normal wear conditions. Store finished pieces away from direct sunlight when not wearing them. Avoid displaying jewelry in sunny windowsills.

For pieces that will see extensive outdoor wear, consider adding a UV-protective topcoat or accepting that all epoxy experiences some degradation over many years of intense sun exposure. Quality formulas resist yellowing much more dramatically than budget options.

What types of findings work best for attaching to resin jewelry?

Glue-on findings use a jewelry-grade adhesive (E6000 or similar) on sanded surfaces for maximum bond strength. Screw-in findings work for thicker pieces. Embedded findings (placed during pouring) create the strongest mechanical bonds but require careful positioning.

For drilled holes, use findings designed for that application, like jump rings or wire wrapping. Always roughen smooth resin surfaces with fine sandpaper before gluing findings-this dramatically improves adhesion. Test bond strength before wearing valuable pieces.

Can I fix bubbles after the resin has already cured in the mold?

Surface bubbles sometimes sand out with progressive fine grits, followed by polishing or a clear topcoat. Internal bubbles are permanent-they're trapped inside the cured resin.

Prevention is the only real solution: slow mixing, adequate degassing time, heat treatment during the working window, and pouring techniques that minimize air incorporation.

If a piece has significant internal bubbles, decide whether it's wearable as-is with character or needs to be remelted and repoured (advanced technique) or simply discarded and remade.

How long should I wait before drilling holes or attaching findings to cured resin?

Wait at least 72 hours for a full cure before drilling, sanding, or applying mechanical stress. Surface hardness at 24 hours doesn't mean complete internal curing. Premature drilling can crack pieces or create rough holes. Working with fully cured resin produces clean results with sharp bits at moderate speeds.

Support pieces from underneath while drilling. Use sharp jewelry drill bits and work slowly; rushing creates chips or cracks. For gluing findings, wait 72 hours plus ensure surfaces are clean, dry, and lightly sanded for optimal adhesion.

Start Creating DIY Jewelry Today With Resin

Your creative jewelry designs need epoxy that won't yellow, cloud, or fail after hours of careful work. Whether you're launching a jewelry business or creating gifts for loved ones, professional results require professional-grade materials.

Clear Resin formulas provide the crystal clarity, UV protection, and durable finish your handmade jewelry deserves. Our easy mixing ratios and reliable curing give you confidence in every piece you create. Begin your jewelry-making success with Clear Resin today.